Climbing hangboard exercises and training programme
Article updated on .
Hangboard training is one of the most direct ways to gain finger strength, provided you follow a real method. This article brings together 3 complete programmes by level (5-7, 7-8, 8-9) and the fundamental exercises, along with the logic that lets you string cycles together without getting injured.

Before you start: 3 rules you can’t work around
Hangboard training loads the climber’s most fragile structure: the finger pulleys. Before talking exercises, let’s set the guardrails.
- The warm-up is not optional. A real training session starts with 10 minutes of light cardio, then a progressive build-up in load (bands, assisted hangs, smaller and smaller holds). You never hang cold on an edge.
- Margin is your best friend. If you can only hold an exercise for exactly the prescribed duration, that’s already almost too much. On a maximal effort, holding 1 or 2 seconds less causes almost no loss of efficiency. 1 or 2 seconds less hanging can be the difference between a session that makes you progress and a session that injures you.
- Always take weight off when you’re starting out. The rule of 3 years of climbing before the hangboard has had its day. A beginner (6 to 12 months of practice) can train without risk as long as they keep their feet on the ground (or use band-assisted hangs). Bouldering is in fact more unpredictable than a controlled hang on a hangboard. What changes with experience is the load you can take, not permission to touch the hangboard.
Understanding what you’re training
Before throwing yourself at a programme, you need to separate 3 different qualities, often wrongly lumped together under the word “strength”.
- Maximum finger strength: your ability to hold a very small hold, briefly. It’s what unlocks the crux of a route or a boulder, and it’s what weighs most when you look at how a bouldering grade is built. You train it with short hangs (5 to 10 s) at maximum load and substantial rest.
- Strength endurance (resistance): your ability to link medium holds without getting “pumped”. Trained with repeated hangs and incomplete rests.
- Volume : the base. Volume of hangs at moderate intensity, which prepares the tissues to take the rest and increases your aerobic volume. This is where every beginner has to start.
In the book The Climbing Bible: Practical Exercises, Martin Mobråten and Stian Christophersen point out that finger strength relative to body weight is the most decisive physical factor in climbing. But they also insist: technique first, strength second. The hangboard comes once your footwork and your hip positioning are already solid. Without that base, gaining finger strength only pushes back the moment when technique limits you again.
The reference holds on a hangboard
A good hangboard offers a variety of grips, as on every Woodrock hangboard model: Varappe 5-7, Varappe 8-9, Origin …:

- Jugs: for recovery hangs, strength-volume work, warming up and pull-ups.
- Deep edges (20 to 25 mm): the reference hold for 90% of the work. That’s the one you calibrate the load on.
- Intermediate edges (15 to 20 mm): for maximum strength work in half crimp.
- Small edges (~10 mm): only to be tackled with a real base. That’s where you switch to full crimp, the most demanding position for the pulleys.
- Pinches, slopers, monos depending on the model: to vary the loading, do sessions at one angle or on one specific grip, and limit the risk of an overuse injury.
The golden rule of grips: open hand → half crimp → full crimp, in that order of increasing risk for the pulleys. Out of 100% of your work, aim for at least 70% in half crimp, which is the optimal strength/safety compromise. Full crimp can be trained by an experienced climber, but sparingly.
No-hangs
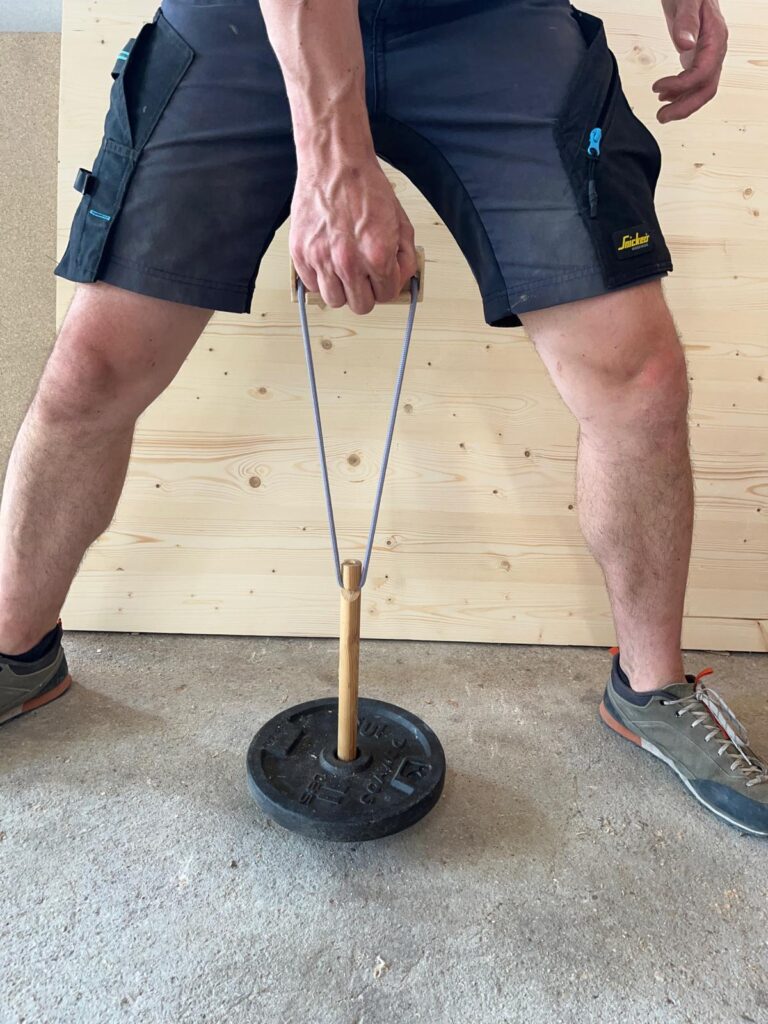
The no-hang means lifting a weight off the ground with a portable grip block (Tindeq, loaded bucket, sling attached to an edge). You pull upwards on a fixed or weighted hold instead of hanging under it. You control the load to within 100 grams, with less strain on the shoulder and the elbow … It’s the ideal tool for starting training and for rehab after an injury.

Volume, or the aerobic system: the one programmes skip
Often skipped by performance-oriented programmes, volume work builds tendon work capacity, muscle volume, aerobic capacity and therefore recovery capacity. The better vascularised the muscle, the faster it can recover and clear the lactic acid it has built up. The minutes under tension also let the system take heavier loads later on. Here are a few ways to train this system:
1. Continuous climbing (2x/week, 20-45 min)
Climb about 1 to 2 grades below your onsight max, at moderate intensity (a slight, bearable burn, nose breathing still possible, able to talk). As soon as you’re breathing hard, you’ve gone anaerobic and the intended effect is lost. Can serve as a warm-up, as technical work, or as active recovery.
2. Linking routes with a partner
Alternate routes and rest on a 1:1 ratio (e.g. 3 min climbing / 3 min rest), at medium intensity, 1 notch below your onsight max. Goal: volume, around 20 routes.
3. Aerobic work on a climbing hangboard
Hangs at ~30-40% of max strength
7 sec hanging / 3 sec rest, x6 (= 1 min)
1 min rest between each block, to be repeated 10 to 20 times (20-40 min total)
- Hangs of 30 to 40 seconds on a good hold (jug or 25 mm edge).
- 2 to 3 minutes of rest between sets.
- 4 to 6 sets in total, without going to failure (1 to 2 seconds of margin at the end).
- Ideal at the start of a cycle (first 4 weeks) or as off-season maintenance.
You won’t feel an immediate gain in pure strength, it’s background work. But it’s that foundation that then lets you push on max hangs without injuring yourself.
Here now are a few examples of generic programmes:
Programme 1, beginner: 6a to 6c
Goal: build the base. At this level, you don’t do max strength on a small hold. You accumulate volume on medium holds to prepare the tissues (pulleys, tendons, synovial sheaths) for more demanding loads later on. Cycle length: 6 to 8 weeks. Frequency: 1 to 2 sessions/week, never consecutive.
Typical session (35 minutes after a full warm-up)
| Exercise | Hold | Format | Rest | Sets |
|---|---|---|---|---|
| Active hangs (shoulders engaged, arms slightly bent) | Jug | 15 s | 30 s | 4 |
| Assisted repeaters | 25 mm edge, half crimp | 7 s on / 3 s off × 5 | 2 min | 3 |
| Open hand hang | 20 mm edge | 10 s | 1 min 30 | 4 |
| Band-assisted pull-ups | Jug | 5 to 8 reps | 2 min | 3 |
Important: you never hang with arms fully extended and shoulders relaxed. You always engage the shoulders (scapulae retracted and depressed, arms slightly bent) to protect the ligaments and the elbow.
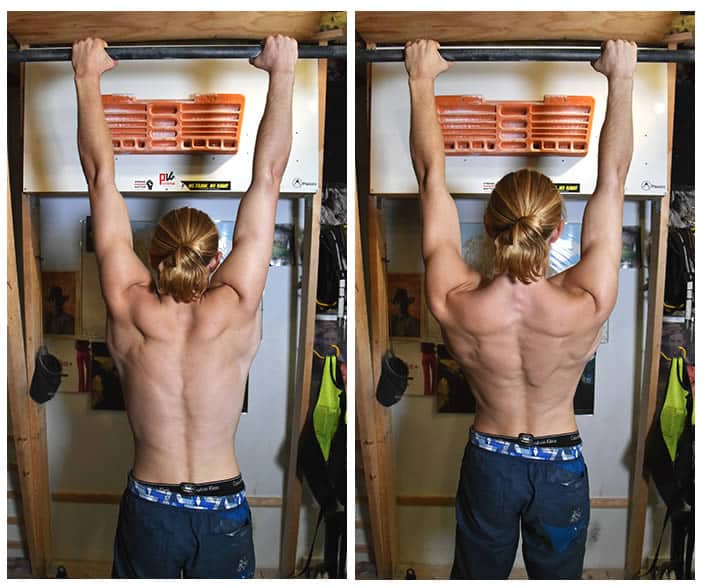
Load: always with assistance (a band under your feet) or feet on the ground, so as to keep 2 to 3 seconds of margin on every hang. If you can hold 20 s without flinching, add resistance; if you’re struggling at 10 s, take some off.
Programme 2, intermediate: 7a to 7c
Goal: develop maximum strength while consolidating strength endurance. This is the level where the hangboard becomes a genuinely effective tool: isolating finger work allows a controlled load, hard to reproduce while climbing. Cycle length: 8 weeks as a block, followed by 2 weeks of deload. Frequency: 2 sessions/week mid-cycle (never 2 days in a row).
Phase A: maximum strength (weeks 1 to 4)
| Exercise | Hold | Format | Rest | Sets |
|---|---|---|---|---|
| Max hangs | 15 mm edge, half crimp | 7 s at max load | 3 min | 3 |
| Max hangs | 20 mm edge, open hand | 7 s at max load | 3 min | 3 |
| Weighted pull-ups | Jug | 3-4 reps, controlled speed | 3 min | 3 |
The load is set with a weight belt (added weight) or an assistance system.
Getting the dose right: beyond 10 seconds, add weight. Below 5, take some off.

Phase B: Strength endurance (weeks 5 to 8)
| Exercise | Hold | Format | Rest | Sets |
|---|---|---|---|---|
| Classic repeaters | 20 mm edge, half crimp | 7 s on / 3 s off × 7 | 2 to 3 min | 4 different grips (examples: 20 mm half crimp, 20 mm open hand, back-3 on 25 mm, 35 mm jug) |
| Long repeaters | 20 mm edge, open hand | 10 s on / 5 s off × 4 | 3 min | 4 |
| 90° lock-off | Jug | 10 s | 2 min | 4 |
On classic repeaters (from the protocol detailed in The Climbing Bible), the last hang should be close to exhaustion, but without your form breaking down. If you let go before the end of the 7th repeat, you’ve put on too much load. If you finish fresh, add some.
Programme 3, advanced: 8a and above
At this level, training can call for both precision and playing with the limits; to avoid injury and stay effective, it’s worth working with a coach. Bastien is very good, you can have a look at his site https://aporteededoigts.com/contact/
That said, if you feel able to manage your training on your own, here’s a draft plan to adapt and fine-tune …
Goal: push maximum strength on very demanding grips (edges <12 mm, monos) and bring in explosive work. Prerequisite: hold at least 10 seconds on a 15 mm edge in half crimp at body weight, with 5 seconds of margin.
Typical weekly cycle (3 sessions)
To be adjusted to your own practice. For example, if you do a big day at the crag where you push hard on strength endurance on Monday: don’t necessarily do the power endurance session the next day, and don’t do the strength session straight after. Maximum strength is trained rested.
- Session 1, max strength on a flat edge: 5 × 10 s on 10 mm in half crimp, max load + 2 s of margin, 4 min of rest. Then 4 × 5 s “short and hard”: hang while pulling as hard as possible for 3 to 5 seconds, 1 min rest.
- Session 2, strength endurance and continuous climbing: 5 repeater sets (7/3 × 7), linked without repeating a hold. Then 4×4 moves on a wall if you have access to one, or 4 sets of 8 pull-ups at medium speed.
- Session 3, explosiveness (optional, to be placed at the start of a bouldering session): “jump to edge” on the hangboard. Start with the arm half extended, throw to a higher hold, catch it with the elbow slightly bent. 6 throws per arm, 2 min rest between sets.
Why you have to keep a training log
You can’t improve what you don’t measure. At every session, note the hold used (hangboard model and depth in mm), the format (hang duration, number of sets, rest time), the weight added or taken off (in kg), and how it felt at the end of the last set. A simple paper notepad does the job, or an app like Crimpd if you prefer everything in one place.
Without data, that famous 2 to 3 seconds of margin stays a hunch. A concrete example: you write down “max hangs 20 mm half crimp, 5×10 s at body weight -8 kg, last set held 11 s”. 3 weeks later, you read “5×10 s at -4 kg, last one 12 s”. You know you’ve gained 4 kg on the same hold with the same margin. Without the log, you’d just have a vague feeling of being “a bit stronger”.

5 mistakes to avoid
- Skipping the warm-up. 5 pull-ups on the ground and off you go onto the edges. That’s exactly the scenario for an A2 pulley rupture. 20 minutes of full warm-up, no exceptions.
- Confusing fatigue with progress. A session that leaves your forearms sore for 3 days was too hard. Progress comes from consistency, not from getting injured.
- Always training on the same hold. Varying the depths and the grips (open hand, half crimp, full crimp, pinch) is the first preventive measure. Monotony of loading is the leading cause of chronic tendinopathy.
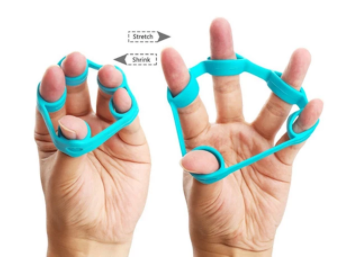
- Ignoring the antagonists. Climbers have overdeveloped flexors and weak extensors. Add a minimum of 10 minutes of antagonist work to every session. Your elbows will thank you in 5 years.
- Not respecting deload weeks. Every 4 to 8 weeks, take 7 to 10 easier days (50% of the volume). It’s during that rest that the adaptations consolidate, not during the loading.
Frequently asked questions
How many sessions per week?
1 to 2 for a beginner or an intermediate, 2 to 3 for an advanced climber, never on 2 consecutive days.
Before or after a climbing session?
Maximum strength work goes before the session, on fresh, properly warmed-up muscles (never cold). Strength endurance can go after, or in a dedicated session. A standalone hangboard session stands on its own.
What if I don’t have a permanently mounted hangboard?
A portable hangboard like the Nomade does exactly the same job. When you’re working a very hard route or boulder, you can even use something close to a max strength protocol as a warm-up. It prepares the body for high-intensity efforts, but through a progressive build-up in load.
How long before seeing results?
On maximum strength: neural adaptations can come very quickly, muscular adaptations take a few weeks and tendon adaptations are counted in months and years.
A propos de l’auteur
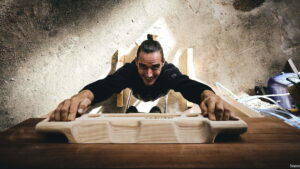
Woodrock c’est le mariage de 2 passions : la menuiserie et l’escalade. Concevoir, fabriquer, usiner et vous envoyer des poutres d’escalade de qualité est une partie de mon quotidien. Le reste du temps, j’aime grimper sur les falaises des contreforts du Vercors.